Friday, December 31, 2010

Wet Felted Beads-Sparkly Fun!


Fibery jewelry with lots of texture and shine, nothing wrong with that!


I've created these tubular beads ranging in size from around .5" to 1.5" using the wet felting technique of layering many feather thin wisps of fiber with lots of metallic threads, Angelina fiber, sari silk and other goodies nestled in between. The non felting fibers are trapped between the layers of feltable fiber creating beautiful pops of color and shine. I've made them with a generous 4mm hole for stringing them on hand spun for a funky, artsy flair. They would also be wonderful strung on a short length of fiber/yarn and used as a spin-in, and of course they already have a jewelry like quality and would be perfect for adding some fibery goodness to any jewelry design. These bead sets have already been listed in my Etsy shop, but I know I will making some for myself very soon!


Have a wonderful and safe weekend.
Happy New Year, Blessings Friends!

Friday, December 24, 2010

PixieDust Fingerless Gloves


I've really been hankering for some fingerless gloves, my hands get so cold sometimes, I thought they would be nice and cozy for around the house as well as out in the big wide world. I spun up a batch of my PixieDust blend in worsted weight and with 70 yards had exactly enough to finish! I wasn't too worried, I was knitting two at a time on a circular, so I knew if I needed to I could mix in another color of hand spun if I ran low.


I dyed up this luscious angora fiber in a pretty, soft pink. I'm planning to spin this and crochet a fluffy trim around the cuff. It's on the roster as soon as I finish a couple of secret projects.

Wishing you all the best of the season and on into the New Year! Blessings Friends!
Melissa

Friday, December 17, 2010

Twirly Curly Bird-Shop Update

It's been a crazy busy week, normal for this time of year, it will settle down soon enough. It's been especially productive on the fiber front and I have added lots of goodies to the shop! Here's a tiny sampling.


I am now carrying one of my favorite all time spinning add-ins, Angelina! I have a few colors with plans to add more! Ooo, Ahhh, Sparkle!


I've added a few new items to the Spinners Candy section of the shop, new fiber palettes and art batts, lots of color and texture for spinning play!


I've put together a kit for those who want to do some pixie knitting of their own, it includes patterns for stockings hats and sweaters perfect for the wee folk in your neck of the woods. I've also included two balls of my PixieDust hand spun, one in lace weight and one in sport weight, the kit contains enough yarn for two sets of each pattern, plus tiny colorful hangers and diminutive little clothes pins, perfect for hanging your pixie knits. The hangers and clothes pins come in an artsy little keepsake tin.

Take a moment in this hectic holiday season to put your feet up,kick back and take a peek around the shop, I've created a coupon for my blog readers giving you 20% off, good for purchases through the rest of the month.

To use the coupon code:

Visit my etsy shop at www.etsy.com/shop/twirlycurlybird

First add an item(s) from my shop, to your cart and when you’re finished shopping,start the check out process.

Enter the code, CURLYBIRDEXPD2010 in the ‘notes to seller' and the email address where the revised invoice should be sent.

Complete the order but do NOT go to Paypal to pay.

You will receive a revised invoice, and a link to complete payment, via email reflecting the discount.


Have a great weekend! Blessings friends!
Melissa

Friday, December 10, 2010

Textile Art Market


(click to enlarge postcard)
Hello Fiber lovers! If you're local and want the opportunity to shop the wares of tons of talented fiber artists, stop by and visit us at the Prince Conference Center. I was helping set up earlier and there are so many beautiful items!

Have a great Weekend! Blessings Friends!
Melissa

Thursday, December 2, 2010

Winter Wonder Art Yarn Scarf

It's been a really creative week, I've been doing so much spinning and knitting, plus lots of other fiber related activities, which I always enjoy. On my list of things I wanted to get done were some scarves knitted with my hand spun art yarn. Those delicious thick yarns can really sparkle up a simple scarf.


It all started with this batt I blended up, Winter Wonder. Chuck full of super soft, creamy white and silver fibers, like angora, alpaca, mohair, wool, milk protein fiber and lamb locks. Providing tons of softness and sheen. For little wisps of color I added soft tones of my hand dyed, in blues, pinks and lilac. I also sprinkled in short lengths of some of my favorite novelty yarns, like Crystal Palace Stardust and Splash, they really gave the spin that jack frost touch. You can see the silvery splash dancing across the batt, looking very much like frost on a window pane. Plus shimmery Angelina for extra sparkle, like sunlight on an icicle.


I ended up spinning and plying four strands of wintery art yarn and plying them together with another Crystal Palace yarn, a super soft pure, beautiful white pom yarn, which I over wrapped with various styles of silver thread.
Above is a close up of the yarn.


This is one of my latest creations, the Winter Wonder art yarn scarf. I'm really happy with how it turned out! When I finished knitting this, I noticed that it wanted drape in soft swirls. I decided to really play that up by weaving through ribbons of tulle (love tulle, can't get enough of it!!!) which I hand dyed in pale turquoise. (I've been playing with dying lots of synthetic fibers lately!)


I added Winter Wonder fringe to the ends and included some more tulle, I really like the effect. You can sort of see in this close up, the Winter Wonder fringe is knotted on the ends, creating these chunky little snowballs. It reminds me of the little balls of snow and ice that clung to my wool mittens as a child.Remember how your mitts would just be caked with little snow balls when you finally dragged yourself in from playing in the snow? What I find interesting about this scarf is that while it has these little whimsical touches, it is also artsy and beautiful. As always, I really enjoyed the creative process, it's cool how sometimes things work out better than you could have imagined or visualized at the start.

I hope you are all enjoying the fresh start to the new month and the fresh layer of the first snow (first for us) crisp and clean as we wind down this last month of the year and gear up for the new year to come. Blessings Friends!
Melissa

Friday, November 26, 2010

Hand Dyed Fabric-Upcycling


I had fun experimenting with a new fiber this past week, and my upcycling friends will love this! I was thinking about a fabric to use for lining the gift boxes I made a few weeks back. Then I remembered something I learned from my multi-talented craft group ladies who are scrapbookers/paper crafters. They had painted dryer sheets and used them to embellish their art projects. I experimented with different pigments made for scrapbooking, but in the end I decided to try dyeing them with my fiber dyes. I wasn't sure the acid dye would work because this is a synthetic fiber and also because of the fabric softener residue left on the sheets. As you can see it worked out wonderfully! The colors turned out so beautiful and I left the rumpled textural look to the sheets when I affixed them inside the boxes. Gosh I love texture!

I found I was able to achieve a really great dimensional look by layering the fabric and applying dashes and swirls of shimmer on the multiple layers. This creates a neat effect, which doesn't quite photograph, it's very understated, but adds that extra little zing.

With some of the scraps I made these cute little Yo-Yos with buttons and sparkle trim. They will make great embellishments for my boxes and decorations, and they'll make a fun addition to gift tags too! I'm also saving up sheets/scraps for spinning into my art yarn, I'm hoping it will add a cool textural effect to my yarn too. I think I'll do a little test spin today!

Have a wonderful weekend! Blessings Friends!
Melissa
P.S. My friend Tamara (Via Verde Farm) saved me a large sheet of similar material which came wrapped around a new appliance! Thought I'd pass this on to everyone since this is the season for giving and receiving electronics of all shapes and sizes so that you can be on the look out for upcycling opportunities of your own!

Friday, November 19, 2010

Icicles on My (Inside the) House Tree

I know, it sounds kind of strange, right? Referring to my House Tree, so let me explain.

I stumbled across an image once, this was quite awhile ago, of a beautiful tree that someone had made to cover a support pillar in the middle of the room. I think it was made from paper mache, but picture something far more beautiful than the stuff we worked with as children. Anyway, I thought, I need a house tree too! I wanted something a little more portable and I was on the look out for the structure I had in mind to make my own paper mache house tree. Before that could happen, mother nature gave me the perfect little branches to create a house tree. I had an old enameled French flower bucket, and using plaster of paris, I securely set the branches in the base. Voila, House Tree. My idea was to use it as a display for pretty little collections of one type of item. Some of my past displays include old antique keys, curly birds (birds with curly feathers or long curly tails) and hanging tea light holders. Last year sometime, in one of my favorite catalogs, I saw some beautiful quartz crystals that had been made into hanging ornaments. They were sort of pricey, and I thought, I bet I can make some of those myself. So the idea of the icicle collection had it's germination. Being a big fan of icicles I had already made or collected a few, so I had a nice start. Here's how I work when putting these collections together, I gather the items I have that obviously fit into the category, and figure out how to hang them. But then, over the course of a few days, other, not so obvious items that fit the collection will come to mind and I add those too. It's a really enjoyable process, I'll stop, add an object, and go on about my work. Or sometimes it's just about looking at the collection as a whole and deciding where things can be better placed or maybe removing something that really doesn't fit after all. With that wordy explanation/introduction, here are pictures of the House Tree all decked out in icicles, it's my favorite color, shiny! (click on any of the photos to enlarge)

(L)The tree with full branches (R) One of the crystal icicles next to a wire icicle


The quartz crystal and lead crystal garlands


The long dangling icicle is actually a rhinestone necklace of my mums, I added a tear drop lead crystal


On the left is another of my wire icicles and one of my most favorite is on the right, a stunning aurora borealis necklace, more of Mum's bling from glamorous days of yore!

If you would like to make your own quartz crystal garland/ornaments, it's simple. I just used E6000, my favorite go to adhesive for jewelry design, to attach little silver rings to the crystals. Once dry, they're ready to hang individually or as I have, as a garland.

Have a wonderful, sparkling weekend! Blessings Friends!
Melissa

Friday, November 12, 2010

Lots of Fiber Fun!


It's been a busy fiber week, lots of projects and experimentation. I did an extreme tail spin yarn with some of my baby lamb locks, it turned out soft and fluffy. I have two long strands which I ended up spinning and plying on my spindle, it was just too chubby to fit through the orifice on my wheel, even the jumbo orifice on the plying flier! I love how this spun up and I have been swaddling fluffy curly lengths of it round my neck as a scarf, it's so cozy warm and luxurious feeling!


Next up, some more tail spinning, I've done another PixieDust blend, and this time I spun in some of the lamb locks dyed in soft gorgeous shades of pink! (my favorite color) I'm tempted to keep this for myself, but it is destined for the shop. I know I'll be whipping up some more of this yarn, it was super fun to spin.


I started knitting this scribble scarf yesterday, using some of my hand spun coils and my gumball yarn. It knits up really fast, I'm using some of the pink mohair I received a while back from katie7, in the shawl exchange group on Ravelry, it's a perfect base yarn for this project!


Also on the to do list for this week was to make up little window boxes for the spin-ins I have listed in the shop. I'm loving how they turned out and they will keep the spin-ins tidy and safe until they reach their new homes.


Have a great weekend! Blessings Friends!
Melissa

Friday, November 5, 2010

Wet Felting Fun

I've been having so much fiber fun lately, dyeing, spinning and felting. Yesterday was another big dye-fest, once I get started, I want to keep going. Next thing you know the drying racks are chuck-full and am forced to pause long enough to let the fiber dry. Which gave me a good opportunity to update my spinning/dyeing journal. I keep track of my dye recipes and color blends along with spin combinations and new types of fiber I've spun. For each new submission to my journal, I sew in swatches so that I have a nice little visual reminder.


Once I got the journal caught up with my latest dye blends, I decided to try some more wet felting. I've had this idea for a long skinny scarf floating around in my noggin and thought I'd give it a go last night. I used merino, alpaca, silk, mohair, finn/merino, wenslydale lamb locks and of course some sparkle. I positioned some of the locks so that they came off the edges of the scarf. It ended up working out nicely, with cute little curly locks popping off everywhere.


I love how the silk strands formed beautiful shimmering streams on the topography of the scarf. There is a nice soft hand to the fabric too, with a very inviting textural surface imparted by all the various fibers I used. The other project I wet felted used mostly merino and had a much smoother surface, I liked that look too. But the softness created by this blend is perfect for a scarf. I think I will embellish it further by using some silver floss to stitch patterns onto the surface.


These felted beads are what I like to call a happy accident. I tried one of those short cut methods I read about for scouring fiber...I should know better by now. Some things just can't be rushed. It really ended up taking longer using the "short cut" method! Plus some of my alpaca started to tangle and felt. I was able to gently separate/open up most of the tangled fiber. Some of it, the messiest, I decided to use either for wet felting or felted beads. You can see I went for the beads. I dyed the tangled locks, originally white fiber from Birch at Lonesome Oak Alpacas, adding all my favorite color combinations. Alpaca dyes up so beautifully. I love felting beads, it's so addictive. By the time I forced myself to walk away, my hands were shriveled prunes! I enjoyed it so much that when the tangled locks were used up, I started looking for more fiber to felt. That's when I said to myself, OK Miss, that's enough, walk away! The largest beads are about the size of a ping pong ball, the smallest about the size of a pea.

I hope you are all spinning and knitting up a storm too, it's good weather for it as the temperature begins to drop.
Have a terrific weekend! Blessings Friends!
Melissa

Friday, October 29, 2010

New Etsy Shop


Hi folks, it's been a crazy busy week! With tons of fiber happenings and lots of other stuff going on too. I guess the big news is that I finally got around to opening an Etsy shop! I've been meaning to do this for some time now, and with our guilds Textile Art Market coming up, I wanted to have the shop set up so that I could include it in the contact information on my product. The shop is mainly geared toward fiber arts, but I will be adding some other little non fiber gift items in the future. For the moment I have just a few goodies listed but that will be changing soon, as I have dyed up some fibery goodness which I plan on listing early next week. Here's a sample of the goodies.
These charming little Dancing Flower Faeries fall into a category I'm calling Spinners Candy. Each one of these cuties was painstakingly hand stitched for quality and durability. I wanted to be sure that they were spin friendly and water friendly. These will make a great spin-in or tie on for your handspun. They would also be lovely hung as a decoration for those places around the house which are calling for a little faerie magic.

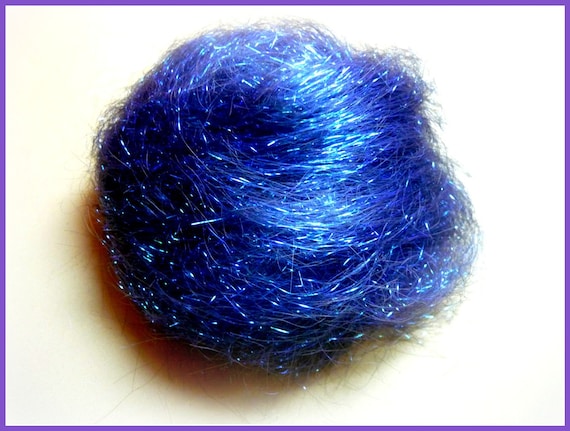
Also a spin-in/tie on, these HotHouse Flowers are made from silk cocoons. I hand painted each little piece and fashioned them into fun, bright, flowers.

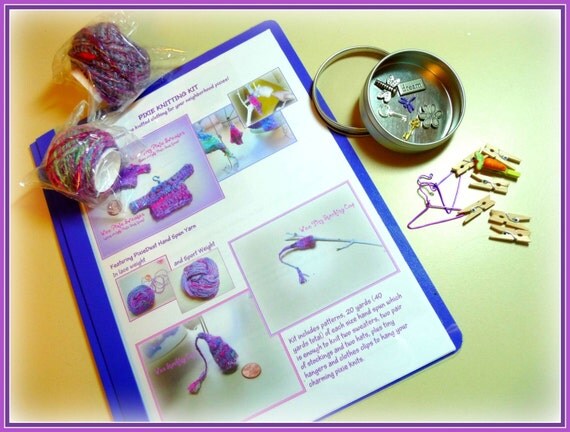
Under the Knitters Candy category I have these pretty little stitch markers in a cute little decorative bottle with a cork stopper. I originally came up with little sets like this to give as gifts to my friends, and have been thinking that others may like them as well. The set includes 6 stitch markers made with gorgeously colored glass, crystal, metallic and semi-precious beads. The markers feature a trigger clasp so that you can easily move or remove your marker while you're working. Rather than having to knit around to it like the fixed ring markers.

So, that's a little peek at some of what I've been up to this week. If you are interested you can visit my Etsy shop here; TwirlyCurlyBird plus if you're local you may be interested in the Textile Art Market coming up in December.

Happy Halloween! Have a great weekend. Blessings Friends!
Melissa

Friday, October 22, 2010

Warm Woolies For The Local Pixies


I decided to do a little pixie-knittin' this week. It's getting colder around here, I thought the wee folk could use some fresh warm clothes. I looked through my stash for the skinniest yarns I could find and they were all too big for my purpose. Then I remembered that I was a spinner and I can make any size yarn I need, silly me! So I gathered a glorious collection of colors, fibers and sparkly za-za-zing and spun this gossamer strand of pure happiness. I'm calling it Pixie Dust. I think the faeries will love it.


While I was waiting for the yarn to dry, I whipped up a little acorn bag from some of my other hand dyed spinnings.


Finally the yarn was dry and I was able to work up a pattern for this petite pair of stockings. My eyes are very happy, boy do I love color!


Next came a wee little sweater. This is a new pattern too, I couldn't locate the one I made up last year. Now that I've written another, it will turn up. This sweater, knitted up in my Pixie Dust yarn is so tiny, it makes the other sweaters look like they're monster size! I have some more knitting to do for the faeries, more hats, scarves, socks and sweaters are in the works. I've spun up some more Pixie Dust in a slightly bigger yarn, I can't wait to start knitting with that. I may have to spin a sock weight Pixie Dust and make some stockings for myself. This kind of fun should really be illegal, I'm a total yarn geek people! Clap if you believe!

I hope you have the best weekend ever! Blessings friends!
Melissa

Friday, October 15, 2010

Berry Tea Cozy (UFO Becomes FO!)


Yea, another finished object to cross off my list of lingering projects. I started this tea cozy over two years ago...maybe longer. I can't really remember why I set it aside, but it ended up in my spinning room up on top of a tall cupboard, I kind of forgot about it, until those times I used my giant tea pot, then I'd think, hey I should finish that cozy. I was forced to squeeze my existing cozy over the tea pot, which made it look like I had a little pig hidden underneath there, cute but a little snug. It didn't take too long to complete, I was almost finished knitting it when it got put up.


I fulled it, decided I didn't love the original idea I'd had, then I cut it up and refashioned it into this design. My original plan was to embroider berries and vines around the body in the upper solid border to match the Juliska, Berry and Vine pattern of the tea pot. I've mulled it over for about three weeks now, and decided not to add any embroidery. It's done, and it works quite nicely, it keeps the tea nice and hot while it's steeping and it's my favorite color, pink!


I bought another fleece this last weekend. I've been blabbing about it all over, so it's not really news at this point, but there is another little story to go along with this. I was sorting the wool (Wensleydale) in the garage, the lawn service has full reign of the neighborhood on Mondays so I had to work inside. I was standing there near the side door, the fleece all spread out on a large screen, sorting it into mesh laundry bags for scouring. I had my ipod in one ear and I was quietly singing along. (I hope I was quiet) I kept seeing something out of the corner of my eye, but when I looked to the left, nothing, I though it was my hair...you know how you see your hair out of the corner of your eye...So I'm working away and I've been standing there for a couple of hours, doing my thing. Suddenly, I get the feeling I'm not alone, I turn toward the side door and I'm not kidding or exaggerating at all, there are eight teeny little red squirrels surrounding the door! They were scattered on the stairs to the left of the door, in front of the door and also to the right side of the door!!! It startled the heck out of me! I chortled out a little startled..ahh! They didn't budge! It was amazing, they were so interested in what I was doing. I had to yell and stamp my feet and fuss and even then not all of them scattered! A couple of them needed an extra, SCOOT! I wonder if one of the little squirrels happened by and saw me standing there, heard me singing my little songs and smelled all sheepy goodness, then went and told his little squirrel buds, "You have got to come and check this out, you wont believe it...I don't even know what it is!" Those little buggers kept coming back too, not all at once, it was more of a squirrel at a time, drive by situation. The little rascals! I was so worried they were going to get into the garage without my noticing. I still have some bags of fleece stored in there which might temp a furry critter to set up housekeeping for the winter. After I gave myself whiplash glancing over my shoulder every two seconds, I remembered I had other screens and put one in front of the door to block the entrance. Crazy little squirrels, I didn't even know there were that many of them in the neighborhood! I wish I'd had my camera...

Have a wonderful weekend! Blessings friends!
Melissa

Thursday, October 7, 2010

A New Ditty Bag!


I have been fooling around with felting for awhile now, mostly regular old ordinary, knit it big, felt it till it's small. I've seen so many beautiful felted projects using both the nuno and wet felting techniques, I was excited to dive in! I first tried nuno felting...while both attempts did not work out how I envisioned, (in other words, the way it was suppose to) I absolutely loved the resulting felted noodles and wild fabric. I'm definitely percolating away, thinking up a project for them. In the mean time I saw some really great tutorials and I was able to see all the steps I needed to be successful in this project. I can see now that earlier tutorials I peeked in on were not as thorough in showing all the steps and tips. If you would like to check out the tutorials, you'll find them here at Felting Lessons. You wont be disappointed! I really, really want to get busy on the nuno felting, but I need to get some silk chiffon, the silk scarves I have are not quite gauzy enough. In the mean time, I played with wet felting. I just did a small test swatch to begin with, it started out 12x20 and felted down to about 6x16. Of course I wanted to make something with it right away! I put together this new ditty bag to hang on my wheel. I recycled the little crocheted pouch that holds the oil for my wheel and the crocheted posies too. I stitched the pouch in, tucked over to one side to keep the oil securely in an upright position, and you can see that I attached the posies to the bottom of the ditty bag.


I was pleased I was able to find a way to incorporate the old oil pouch. I crocheted it using some of my very first hand dyed, hand spun yarn. Of course I had to add some vintage mother of pearl buttons from the old button box! All and all I'm pleased with my first attempt at wet felting, those tutorials made all the difference. I have a lot of ideas for this medium and I can hardly wait to get rolling on them! If only there were more hours in the day!

Have a delightful weekend! Blessings friends!
Melissa

Friday, October 1, 2010

Blackrose Wristlets


I took a little break this week from my UFO round up to spin and knit these cozy wristlets. The pattern is from knitty, check it out here if you're interested, the pattern is for socks and wristlets. It's a quick easy pattern, great for gift knitting. I was concerned that I might not have enough fiber to knit them as long as the pattern suggested, so I knit them both at the same time using the magic loop technique. I started with 1.25 ounces of raw fiber from my friend Tamara at Via Verde Farm, which spun into close to 300 yards of two ply lace weight. The fiber came from her beautiful little cria, Delphine. I did end up shortening the length slightly from 7.5 to 6.5, then I switched to a darker brown for the ribbing and crocheted a petite picot edge to finish. The dark alpaca I used is also from Via Verde.


Here's the little cutie that provided the lovely fiber, look at that sweet face! It spun up into a nice lace weight two ply, just spinning from the washed locks. Such soft cozy fiber and it has a beautiful halo too. By spinning it from the lock I was able to maintain the natural variation of color in this little guys fleece. I was pleased with how they knitted up and I happily presented them to Tamara so she could have a little keepsake from Delphine's first shearing.

Have a great weekend! Blessings Friends!
Melissa

Friday, September 24, 2010

UFO Round Up-Sari Silk Satchel


Yea, another UFO becomes a FO! I have been working on this one for awhile. I had to set it aside while I waited for more recycled sari silk yarn to arrive. Then I needed to get around to sewing the original liner which was in silk brocade. However when I saw it inside the bag...I didn't like them together. (Nice, now I have a liner for another satchel, so no worries!)


I eventually decided on denim, then I got the idea to recycle a pair of jeans. Turned outside in, I sewed the liner to fit, keeping all the pockets for compartments inside the satchel. Even the belt loops will function as a place to clip my keys. It was a difficult task because the sewing machine was so temperamental and the distance between the pressure foot and the feed dogs on the weird, off-brand machine of my Mum's is so narrow that I had to manually push/draw the fiber through, not fun. I must to admit to having more than a few harsh words for the sewing machine! Plus toward the end of the project, the bobbin tension went crazy and created all those lovely loops on the underside of the fabric...NUTS!!! But now it is complete, it's not as professionally sewn as I like to see, but I opted for finishing it as opposed to letting it hang out till I got the machine tuned up. I will definitely have to look into a new sewing machine! The nice thing about sewing is that I can always redo the parts that need tweaking later. But for now, I'm calling this one done! Another UFO crossed off the list, Yippee!

Have a great weekend! Blessings Friends!
Melissa

Friday, September 17, 2010

UFO Round Up-Scarflet With Vintage Buttons

I'm so excited to be back working on my projects again!!! I decided that before I start a new project, I will round up my UFOs and finish them. I have four knitting projects, one crochet and one sewing project to complete. I'm happy to say that I completed two of my knitting, one of which may still receive some surface embellishment, so I'm not posting that one (felted tea cozy) yet. Plus I finished knitting and lining a satchel I was working on. I need to find/make a buckle for the strap, once I know the size of the buckle, I can whip up the strap and attach it! So though technically it's not done, the hardest part, lining it, is. I'm in the home stretch on this one, so I'm calling it 95% complete.


This little cutie is 100% complete! My Scarflet with Vintage Buttons. I love how this turned out, it's knitted with Mini Mochi in #102 Flame Rainbow, using size three needles. ( I always google the color number to see what the name of the yarn is. I wish they would print it on the label.) It's a cozy, soft merino blend which is perfect for snuggling around your neck to keep the chilled winds at bay

Font size
One of the reasons I'm so excited about this project, aside from finishing it, is the BUTTONS! I was able to use some of my vintage buttons for the closure, and also for embellishment. I have a few little jars of buttons I magpied from the old button box when I was a kidlet. Thank goodness I was such a little button hound, when I was in my early twenties, my folks house caught fire and the gigantic button box was destroyed. As I was going through my closets and drawers when we were cleaning out the house, I kept coming across little baggies, old ring boxes and change purses stashed with pretty little buttons! I had completely forgotten about them, it was a nice surprise. I don't want to give you the impression that I have pounds of old buttons, it probably adds up to about a cups worth. But little Melissa had a good eye and chose some of the prettiest buttons! It was nice to be able to use some of them in this scarflet project.

I hope you have a wonderful weekend! Blessings Friends!
Melissa

Popular Posts

About Me

My photo
I'm a crafter, knitter, tinkerer, who always seems to have a project or two on the launch pad. I love to share what I'm working on and I love to see what other folks are working on too, so please comment and let me know where I can see your latest creation!